
Explore this easy-to-follow guide on the steps to add 150+ messaging features to your chat app with low-code Flutter chat API.
Tell me how many chat apps have you used in the past few years. More than a 2 right? Whether it is for personal or professional use, we rely on messaging these days for instant communication.
On the other hand, this surge in the usage of real-time communication apps is increasing the pressure on developers like you. Ask why? Now, developers and businesses are expected to create highly responsive chat apps that are engaging and high-performing at the same time.
But do you think you could balance the efficiency with the budget of development?
Well yes, this is when you should use Flutter for your app development.
Now, if you are already convinced to use Flutter for your next project, let me suggest you a simple, modern and highly scalable Flutter In-app messaging API from MirrorFly.
There are several reasons why I chose MirrorFly as my Messaging API provider. Let me explain the main reasons why.
10 Reasons Why You Should Choose MirrorFly Flutter Chat API
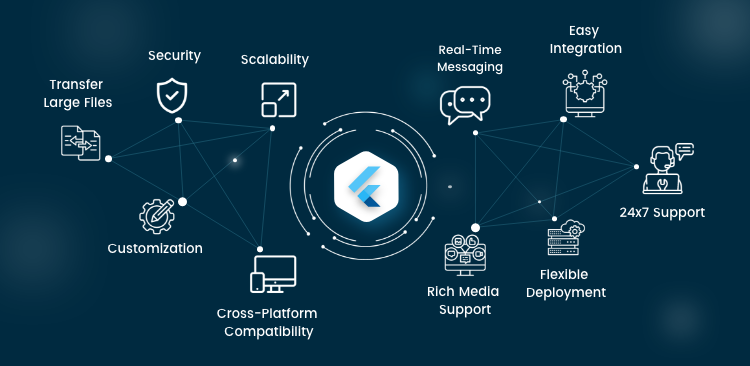
- Real-Time Messaging: MirrorFly offers real time messaging capabilities with over 150+ features. And guess what? MirrorFly just does not stop with messaging. It lets you add video and voice calls, apart from topic-based chat.
- Scalability: MirrorFly is designed to scale with your app’s growth, making it suitable for both small and large user bases. It can handle high loads and growing user demands.
- Cross-Platform Compatibility: MirrorFly supports multiple platforms, including Flutter. This means you can easily create your chat app that can run on iOS and Android devices, just with a single codebase.
- Rich Media Support: MirrorFly allows users to send multimedia content, such as images, videos, and files, enhancing the user experience and making it suitable for a wide range of Instant messaging applications.
- Security: MirrorFly provides security features, including end-to-end encryption, to protect user data and conversations, ensuring privacy and security of user conversations are strictly maintained.
- Customization: MirrorFly lets you customize the instant messaging features as much as you need. So, you can develop your real-time messaging apps as per your preferences, tailored for your potential customers.
- Easy Integration: Integrating MirrorFly Flutter chat API is easier, quicker, and simpler than you think. You can add their source code to your apps in just 10 minutes.
- Transfer Large Files: MirrorFly lets you share large files with other users, without any format or size restrictions.
- Flexible Deployment: Whether it is your own servers, third-party servers or MirrorFly’s cloud servers, you can host your app anywhere you want.
- 24×7 Support: Do not worry if you are stuck with the integration or want more details about MirrorFly Flutter messaging API. The tech team is always ready to support you at any step of your development.
- Complete Source Code
- Lifetime Data Ownership
- Deploy on Own Server
Also Read: 10 Flutter Packages for Real-Time Communication
Steps To Build Chat App With MirrorFly Flutter Messaging API
Now, as we start with the API & SDK integration, I’d like to tell you that we’ll be using a Flutter plugin by MirrorFly for this project.
Before we get started, please check the prerequisites needed for this project.
The requirements are:
- Android Lollipop 5.0 (API Level 21) or above
- Java 7 or higher
- Gradle 4.1.0 or higher The minimum requirements for Instant messaging SDK for iOS
- iOS 12.1 or later
Once the requirements are ready, start with the below steps.
Get Your License Key
Follow the below steps to get your license key:
Step 1: Sign-up for a new MirrorFly account or Sign-in to your existing account.
Step 2: Next, go to the ‘Application Info‘ section in the Overview section of your account.
Step 3: Now, copy your License Key.
Create Android Dependency
Step 4: Go to your Android folder, and add the following to your root build.gradle file
allprojects {
 repositories {
 	google()
 	mavenCentral()
 	jcenter()
 	maven {
     	url "https://repo.mirrorfly.com/snapshot/"
 	}
 }
}
Navigate to the app/build.gradle file, and add the following dependencies.
android {
	packagingOptions {
 	exclude 'META-INF/AL2.0'
 	exclude 'META-INF/DEPENDENCIES'
 	exclude 'META-INF/LICENSE'
 	exclude 'META-INF/LICENSE.txt'
 	exclude 'META-INF/license.txt'
 	exclude 'META-INF/NOTICE'
 	exclude 'META-INF/NOTICE.txt'
 	exclude 'META-INF/notice.txt'
 	exclude 'META-INF/ASL2.0'
 	exclude 'META-INF/LGPL2.1'
 	exclude("META-INF/*.kotlin_module")
   }
}
Create iOS dependency
Step 5: Go to the end of your iOS/Podfile, and add the following code.
post_install do |installer|
  installer.pods_project.targets.each do |target|
	flutter_additional_ios_build_settings(target)
	target.build_configurations.each do |config|
  	config.build_settings['IPHONEOS_DEPLOYMENT_TARGET'] = '12.1'
  	config.build_settings['ENABLE_BITCODE'] = 'NO'
  	config.build_settings['APPLICATION_EXTENSION_API_ONLY'] = 'No'
  	config.build_settings['BUILD_LIBRARY_FOR_DISTRIBUTION'] = 'YES'
  	config.build_settings["EXCLUDED_ARCHS[sdk=iphonesimulator*]"] = "arm64"
 	end
  end
end
Step 6: Enable all the capabilities mentioned below.
Goto Project -> Target -> Signing & Capabilities -> Click + at the top left corner -> Search for the capabilities below

App Groups
Create Flutter dependency
Step 7: Add the below dependencies in pubspec.yaml.
dependencies:
  mirrorfly_plugin: ^0.0.7
STEP 8: Run the flutter pub get command. With import, use all classes and methods.
import 'package:mirrorfly_plugin/mirrorfly.dart';Initialize MirrorFly Plugin
Place the below code in your main.dart file inside the main function before runApp().
 void main() {
  WidgetsFlutterBinding.ensureInitialized();
  Mirrorfly.init(
  	baseUrl: 'https://api-preprod-sandbox.mirrorfly.com/api/v1/',
  	licenseKey: 'Your_Mirrorfly_Licence_Key',
  	iOSContainerID: 'Your_iOS_app_Group_id');
  runApp(const MyApp());
}User Registration
Register a user in sandbox live mode using the following code.
Mirrorfly.registerUser(userIdentifier).then((value) {
  // you will get the user registration response
  var userData = registerModelFromJson(value);
}).catchError((error) {
	// Register user failed print throwable to find the exception details.
	debugPrint(error.message);
});
Send a One-to-One Message
Enable sending of messages, using the following code.
var userJid = await Mirrorfly.getJid(username);


Mirrorfly.sendTextMessage(message, jid).then((value) {
  // you will get the message sent success response
  var chatMessage = sendMessageModelFromJson(value);
});
Receive a One-to-One Message
Enable receiving of messages, using the following code.
Mirrorfly.onMessageReceived.listen(result){
  // you will get the new messages
  var chatMessage = sendMessageModelFromJson(result)
}
Conclusion
So, that’s it! You now know how to build Flutter in-app Chat with API. You can go on to customize your app’s UI and add more features to your app as per your needs.
And if you do not have a team and are looking to hire experts to build your branded app in Flutter, just leave it to us. Our experts can build a complete chat app for you.
Got more questions? Leave your comment below or talk to our tech team now!
Get Started with MirrorFly’s Flutter Chat Features Today!
Drive 1+ billions of conversations on your apps with highly secure 250+ real-time Communication Features.
Contact Sales 200+ Happy Clients
-
Topic-based Chat
-
Multi-tenancy Support

Related Blogs:
- Top 10 Flutter Packages for Real-Time Communication
- Best 6 PubNub Alternatives
- How to Build a Flutter Chat App?
- Single Tenant vs Multi Tenant: Differences, Architecture, & More
Frequently Asked Questions:
How do you make a messaging app on Flutter?
Here’s how you can build a messaging app on Flutter,
1. Set up a Firebase project for your preferred IDE.
2. Download configuration files- google-services.json for Android and GoogleService-Info.plist for iOS.
3. Add dependencies for your Firebase project both for backend storage and user authentication.
4. Initialize the project into your Flutter application using the initializeApp() file.
5. Add real time instant messaging functionality to your Firebase project to enable communication.
6. Finally, check for any bugs on various platforms and launch.
How do I push notifications on Flutter?
Here’s how you can easily add push notifications on Flutter,
1. Navigate to the Firebase console and create a Firebase project.
2. Then, integrate the Firebase SDK into your Flutter project and download the configuration files.
3. Now, add the Firebase cloud messaging dependency to pubspec.yaml file.
4. Once done with the previous step, initialize Firebase and create
What are the main reasons to choose Flutter?
The main reasons why developers prefer to use the Flutter framework is because of:
1. Single codebase for Android and iOS platforms
2. Hot Reload attribute
3. Suite of customizable widgets
4. Active developer community support
5. It is easy to integrate into any third-party libraries.
6. Reduced development cost and time.
How do you add live chat to the Flutter app?
Follow the below steps to add live chat to your Flutter app:
1. First, create a new Flutter application and connect it to the Firebase services
2. Build the basic user interface for your instant messaging application.
3. Add the required dependencies to the file pubspec.yaml
4. Next add AuthProvider Class() to your Firebase project to implement sign-in and sign-out.
5. Implement real-time chat functionality using Firebase Firestore.
6. Finally, deploy the app.
Are Flutter chat apps cross-platform?
Yes, Flutter chat apps are cross-platform as Flutter itself is a cross-platform framework. Meaning, its single codebase can be used to deploy on multiple platforms, like Android and iOS.
Alexander is a digital marketing expert and tech enthusiast with adept knowledge and specialisation across in-app communication, live streaming, and video solutions. With 16+ years of experience in the industry, he brings out the best insights about the latest technologies, products and services as brand materials. The outcome of his strategies reflect as top rankings on search engines and exponential lead conversions for businesses.