

A step-by-step guide to building a chat system in 5 minutes
More than 3 Billion people around the world are using messaging apps in their day-to-day lives. Most of the time they use WhatsApp and Facebook for their personal communication. But the question here is,
Is WhatsApp and Facebook reliable for business communication?
While the parent company of these two messaging giants is facing allegations of data breaches, most experts advise businesses to build their own chat features with custom security.
But, how to build your encrypted chat system? Is it easy?
Keep your worries away! This article will cover everything about building your own chat system, its prerequisites and the complete development process before you get started with your project.
What Is A Chat System?
The chat system is a chat app that uses the TCP/ IP ( Transmission Control Protocol/ Internet Protocol) and follows the client-server model to deliver the messages smoothly between clients. Some popular examples of a chat system are Whatsapp, Facebook Messenger, Discord, Google Chat, and Line.
How Does A Chat System Work?
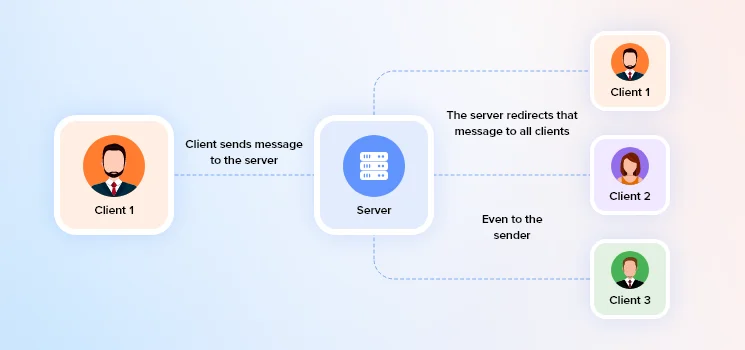
When you launch your chat app, the following processes will take place for each user action. Let me break them down:
Step 1: User Registration and Authentication
- First, a user registers into your messaging app by filling in details like username, email and password.
- This is where you need to implement secure authentication systems to verify user identity. You can use technologies like OAuth, JWT (JSON Web Tokens), or traditional username/password validation.
Step 2: Establishing a Connection
- Once users start using your chat app, it starts connecting to the chat server.
- During this stage, the chat meta data may be exposed to risks like data theft and malware attacks. To ensure that the conversations are safe, you need to use AES-128 protocol and SSL certification.
Step 3: User Presence and Status
- Right when the user enters your app, the server starts maintaining a record of users’ online/offline status and availability.
- This is where an online presence indicator feature will help your app update and broadcast user presence status to their contacts.
Step 5. Message Routing
- Now, you may send 1:1 messages or chat with multiple users. This is where the server receives messages and identifies the recipient based on their unique identifier.
- Make sure you implement a logic to send and receive one-on-one messaging and group chat routing.
Step 6. Real-Time Communication
- You can use WebSocket or a similar technology to establish a persistent, bidirectional connection between the client and server.
- This enables real-time communication within your app at the lowest possible latency.
Step 7. Message Delivery and Receipt
- Next you need to implement message delivery and receipt confirmation in your chat system.
- Optionally, you can include read receipts to inform the sender when the recipient has read the message.
Step 8. Message Storage
- When it comes to accessing the messages, decide whether messages will be stored temporarily for real-time delivery or persistently for future retrieval.
- Implement a database system to store messages securely, associating them with the sender, recipient, and timestamp.
Step 9. Notifications
- Develop a notification system to inform users of new messages, friend requests, or other relevant events.
- You can also keep your users informed when they are not active on your app, through notifications on their mobile apps.
Step 10. Logging Out
- When the user logs out from your app, you need to make sure that you implement a secure logout mechanism. So that the client disconnects from the server and updates the user’s presence status.
Step 11. Scaling and Performance
- Keep an eye on the scalability of your chat system. You can maintain load balancing and scalable infrastructure to handle increasing numbers of users and messages, as your app grows.
12. Testing and Quality Assurance
- Conduct thorough testing of the app, including unit testing, integration testing, and user acceptance testing.
Pay special attention to security testing to identify and address potential vulnerabilities in advance to avoid threat to your brand integrity and reputation.
Is It Possible To Build A Chat System In 5 Mins?
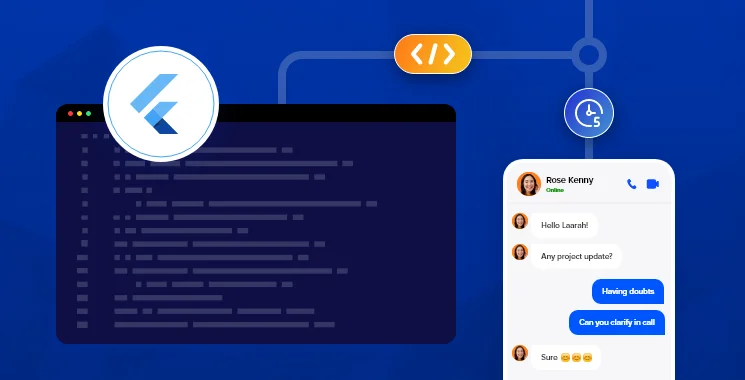
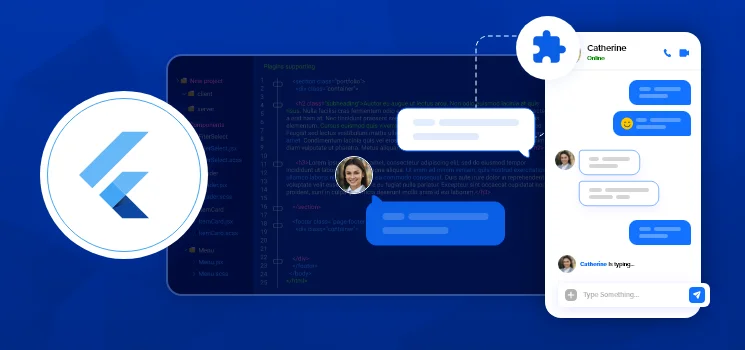
Yes, it is possible to develop any instant messaging application in just 5 minutes. You can simply use a pre-built Flutter plugin to build a complete chat app.
A Flutter chat plugin comes with plug & play messaging components to add more than 1000+ real time chat features along with video and voice calls.
Here are some of the unique benefits of a Flutter plugin:
- Quick & easy integration
- Unlimited Chats & Calls
- Calendar Synchronization & Scheduling
- Chat Tagging
- Chat History
- Chat Backup
- Multi-Device Login
- Enterprise Scalability & Reliability
- SIP & VoIP Call
- Topics Based Chat
- Custom Security
- Share Large Files
Once the chat system is built, enterprises managing Macs at scale can deploy it using Apple Business Manager, which is a best practices approach. This approach streamlines device setup along with your chat system infrastructure.
Where can you find the best Flutter chat plugin?
Now, this is a serious question. While you may find 100s of Flutter SDKs on the internet, it is necessary that you tick all the features listed above. This is important because you need to implement all of the features above to give your users a seamless messaging experience.
Fortunately, MirrorFly’s instant messaging software comes with the most reliable and secure Flutter chat plugin that you can add to your app in just 5 mins.
There are 3 ways to get this feature-rich Flutter plugin:
- You can directly download the plugin by creating a MirrorFly Account
- Download the sample app from Github
- Download the plugin from pub.dev
Once you’ve downloaded the plugin, you can follow the steps below to build your own chat system.
How To Build Your Own Chat System?
As we’ve discussed above, I’ll guide you on your chat system development with MirrorFly’s Flutter chat plugin.
But before we get started, you need to check the prerequisites needed for this project.
Make sure you have the following:
- Android Lollipop 5.0 (API Level 21) or above
- Java 7 or higher
- Gradle 4.1.0 or higher The minimum requirements for Chat SDK for iOS
- iOS 12.1 or later
When your requirements are ready, you can start with the below steps.
Get Your License Key
The first step is to obtain your license key from MirrorFly
- Step 1: Sign-up for a new MirrorFly account or Sign-in to your existing account.
- Step 2: Once you’ve logged into your account, navigate to the ‘Application Info‘ section in the Overview section.
- Step 3: You’ll find your License Key. Copy it for the integration.
Create Android Dependency
Step 4: In the root build.gradle file of your Android folder, add the following:
allprojects {
 repositories {
 	google()
 	mavenCentral()
 	jcenter()
 	maven {
     	url "https://repo.mirrorfly.com/snapshot/"
 	}
 }
}
Next, add the following dependencies to the app/build.gradle file
android {
	packagingOptions {
 	exclude 'META-INF/AL2.0'
 	exclude 'META-INF/DEPENDENCIES'
 	exclude 'META-INF/LICENSE'
 	exclude 'META-INF/LICENSE.txt'
 	exclude 'META-INF/license.txt'
 	exclude 'META-INF/NOTICE'
 	exclude 'META-INF/NOTICE.txt'
 	exclude 'META-INF/notice.txt'
 	exclude 'META-INF/ASL2.0'
 	exclude 'META-INF/LGPL2.1'
 	exclude("META-INF/*.kotlin_module")
   }
}
Create iOS dependency
Step 5: Add the following code to the end of your ios/Podfile
post_install do |installer|
  installer.pods_project.targets.each do |target|
	flutter_additional_ios_build_settings(target)
	target.build_configurations.each do |config|
  	config.build_settings['IPHONEOS_DEPLOYMENT_TARGET'] = '12.1'
  	config.build_settings['ENABLE_BITCODE'] = 'NO'
  	config.build_settings['APPLICATION_EXTENSION_API_ONLY'] = 'No'
  	config.build_settings['BUILD_LIBRARY_FOR_DISTRIBUTION'] = 'YES'
  	config.build_settings["EXCLUDED_ARCHS[sdk=iphonesimulator*]"] = "arm64"
 	end
  end
end
Step 6: Next follow the steps and enable the App Groups capability.
Goto Project -> Target -> Signing & Capabilities -> Click + at the top left corner -> Search for the capabilities below

App Groups
Create Flutter dependency
Step 7: Add the below dependencies in pubspec.yaml.
dependencies:
  mirrorfly_plugin: ^0.0.7
Step 8: Run the flutter pub get command.
import 'package:mirrorfly_plugin/mirrorfly.dart';
Initialize MirrorFly Plugin
Inside the main function of your main.dart file, place the below code.
void main() {
  WidgetsFlutterBinding.ensureInitialized();
  Mirrorfly.init(
  	baseUrl: 'https://api-preprod-sandbox.mirrorfly.com/api/v1/',
  	licenseKey: 'Your_Mirrorfly_Licence_Key',
  	iOSContainerID: 'Your_iOS_app_Group_id');
  runApp(const MyApp());
 }
User Registration
Register a user in sandbox live mode using the following code.
Mirrorfly.registerUser(userIdentifier).then((value) {
  // you will get the user registration response
  var userData = registerModelFromJson(value);
}).catchError((error) {
	// Register user failed print throwable to find the exception details.
	debugPrint(error.message);
});
Send a One-to-One Message
Enable sending of messages, using the following code.
var userJid = await Mirrorfly.getJid(username);Mirrorfly.sendTextMessage(message, jid).then((value) {
// you will get the message sent success response
var chatMessage = sendMessageModelFromJson(value);
});
Receive a One-to-One Message
Enable receiving of messages, using the following code.
Mirrorfly.onMessageReceived.listen(result){
  // you will get the new messages
  var chatMessage = sendMessageModelFromJson(result)
}
Conclusion
So, that’s it! Now you know all about building a chat system on your own in just 5 minutes. We’ve covered the need for a chat system, its benefits and the steps to build a complete messaging app. You can also build your chat system on top of other technologies.
Check out MirrorFly’s Chat SDKs & APIs for
Need more details? Contact our team of experts right away!
Looking To Build Your Own White-label Chat App?
Get our enterprise-grade communication solution, that can be set up on your company servers.
Contact Sales 100% customizable
-
White-label solution
-
Full source code

Frequently Asked Questions:
Is it possible to build a Flutter chat app in 5 minutes?
Yes, you can develop a fully-featured Flutter chat app in less than 5 minutes using a Flutter plugin. Moreover, this plugin is like a plug-and-play component that lets you add more than 150+ in-app call and messaging features in a jiff.
How do I make my chat system secure from attacks?
You might probably need a series of security protocols to keep your chat infrastructure safe and sound. Implement authentication mechanisms like OAuth, and JSON to keep identity safe, and AES and SSL to keep chat metadata unexposed to data thefts and malware attacks.
However, you can also use MirrorFly’s Flutter chat SDK which comes packed with multiple security protocols to build a reliable messaging app.
Can I customize my chat system?
Yes, you may build highly customizable and visually appealing chat software the way you want with MirrorFly’s self-hosted SDK that lets you customize features and UI kits, and helps you brand your app revealing your identity.
What tech stacks to use to build a messaging app?
The following tech stacks can be used to build a messaging app:
1. Front-end: Javascript, Kotlin, Swift
2. Back-end: Java, JS, PHP
3. Security Protocols: SSL, AES, Compliances like HIPA A and GDPR
4. Communication Protocols: WebRTC, WebSockets, XMPP
What is the timeline to build a messaging app?
It would take a few weeks to more than 3 months to build a highly responsive messaging app. However, you can build a chat infrastructure in less than 10 minutes if you use a chat SDK to integrate all core functionalities.
Alexander is a digital marketing expert and tech enthusiast with adept knowledge and specialisation across in-app communication, live streaming, and video solutions. With 16+ years of experience in the industry, he brings out the best insights about the latest technologies, products and services as brand materials. The outcome of his strategies reflect as top rankings on search engines and exponential lead conversions for businesses.